
Classification Models from TorchVision#
Introduction#
The torchvision.models subpackage provides a collection of pre-trained models for addressing different tasks, including image classification, pixel-wise semantic segmentation, object detection, instance segmentation, person keypoint detection, video classification, and optical flow.
In this tutorial, we will focus on the ResNet50 model, which is a widely used image classification model. The ResNet50 model is a convolutional neural network (CNN) that has 50 layers and is known for its residual connections, which help in training deep networks. Further information is available on the official site.
Model Preparation#
TorchVision offers pre-trained weights for every provided architecture defined on the torchvision.models subpackage. Initializing an instance of a pre-trained model will download its weights to a cache directory.
We recommend constructing an ONNX file using an officially distributed model equipped with pre-trained weight in the model preparation step. To download and convert the model, create an executable Python script (e.g., prepare_resnet.py) with the following content:
import torch
from torchvision.models import resnet50, ResNet50_Weights

# Using pretrained weights:
model = resnet50(weights=ResNet50_Weights.IMAGENET1K_V1)
model.eval()

# make dummy input depending on the model's input shape
input = torch.randn(1, 3, 224, 224)

# export to onnx
torch.onnx.export(model, input, "resnet50.onnx")
Calibration Dataset#
TorchVision provides the training recipe used in model training. Their training recipes often consist of image loading, resizing with interpolation, center cropping, scaling, and normalization. Before writing the calibration dataset processing code, verify the operations contained in the preprocessing procedure and the proper input shape.
For instance, the input image should be loaded by PIL.Images, resized to (256, 256) using bilinear interpolation, center cropped to (224, 224), scaled to [0, 1] range with division by 255, and normalized with mean=[0.485, 0.456, 0.406] and std=[0.229, 0.224, 0.225].
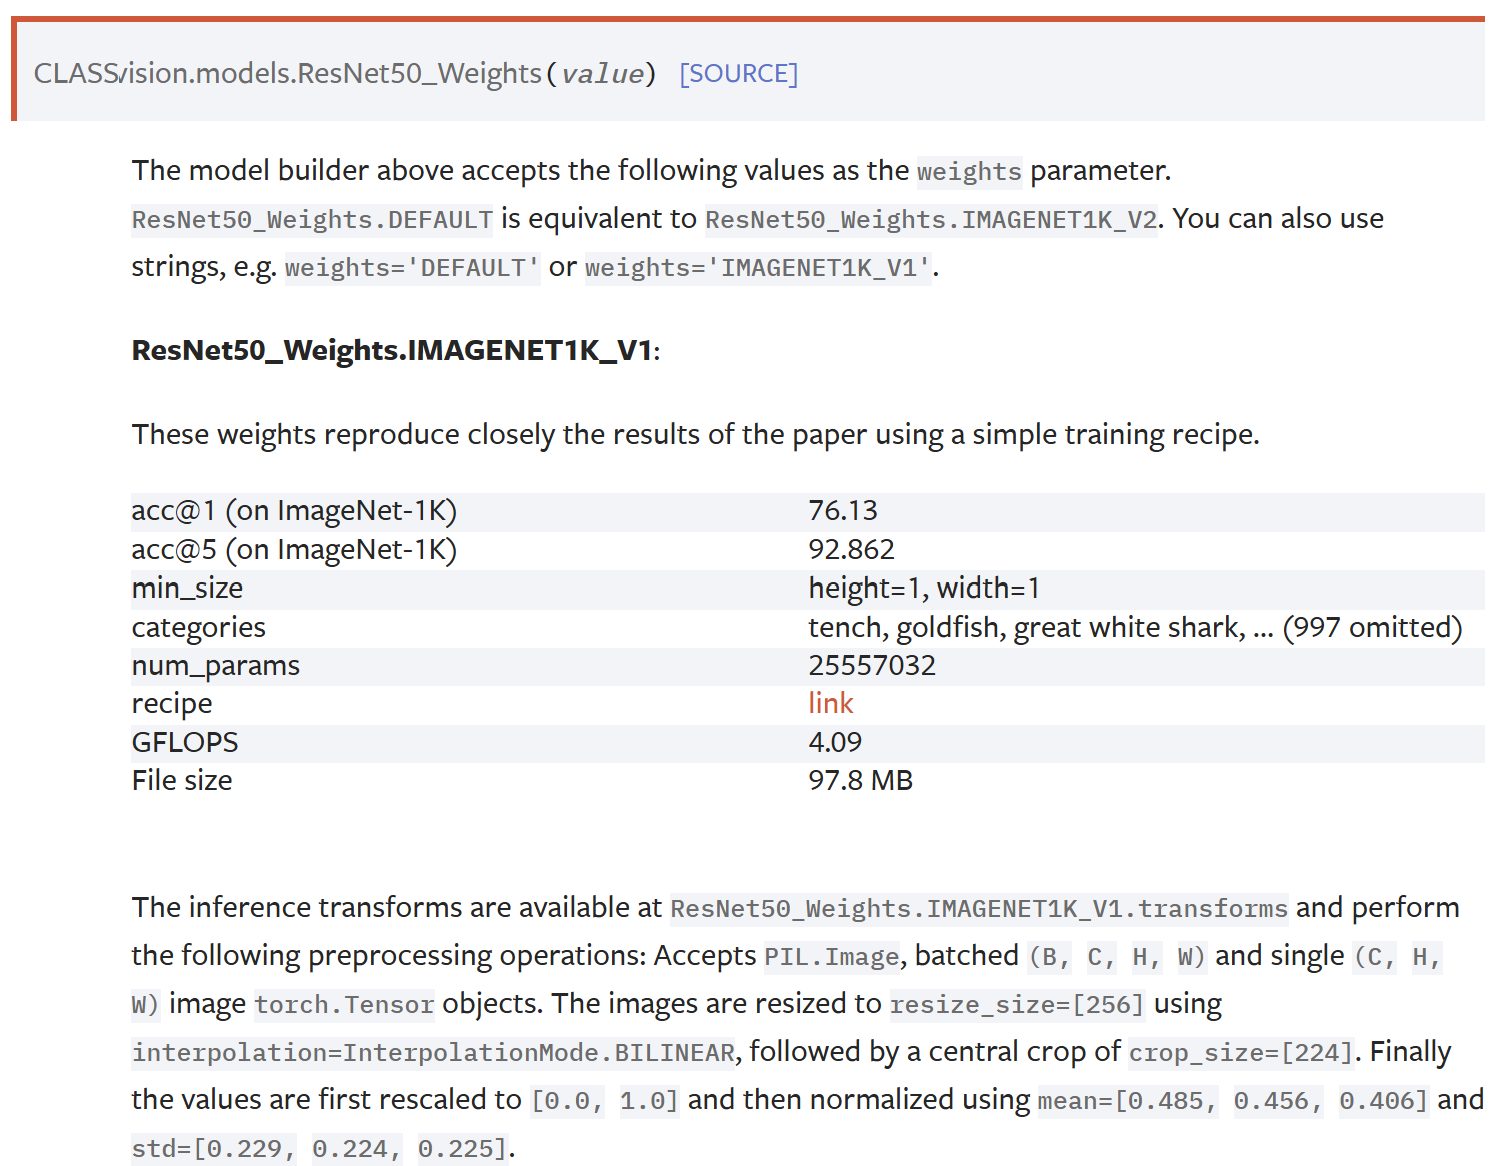
The classification models are usually trained with ImageNet dataset. Therefore, it is recommended to use images that are similar to the image dataset used in training, in the sense of the distribution of the images. For this tutorial, Mobilint’s engineers created a set of image files of 1000 categories, and the name of the file is cali_1000.zip.
As demonstrated in the quick start guide, the qubee compiler provides standard preprocessing operations used in TorchVision. Therefore, the calibration dataset can be generated in two ways.
The first way is writing the preprocessing configuration file(e.g. resnet50.yaml) as follows.
# resnet50.yaml
Datatype: Image
GetImage:
    to_float32: false
    channel_order: RGB

Pre-Order: [ResizeTorch, CenterCrop, Normalize, SetOrder]
Pre-processing:
    ResizeTorch:
        size: [256, 256]
        interpolation: bilinear
    CenterCrop:
        size: [224, 224]
    Normalize:
        mean: [0.485, 0.456, 0.406]
        std: [0.229, 0.224, 0.225]
        to_float_div255: true
    SetOrder:
        shape: HWC
Then, write an executable Python script (e.g., prepare_calib.py) with the following content, to use the preprocessing operations defined in the configuration file above.
from qubee.calibration import make_calib
make_calib(
    args_pre="/workspace/resnet50.yaml", # path to pre-processing configuration yaml file
    data_dir="/workspace/calibration/cali_1000", # path to folder of original calibration data files such as images
    save_dir="/workspace/calibration/", # path to folder to save pre-processed calibration data files
    save_name="resnet50_cali", # tag for the generated calibration dataset
    max_size=100 # Maximum number of data to use for calibration
)
The second way is using a custom preprocessing function. The qubee compiler enables users to deal with images with custom operations.
import torch
import numpy as np
from PIL import Image
import torchvision.transforms.functional as F
from torchvision.transforms import InterpolationMode
from qubee.calibration import make_calib_man

def preprocess_resnet50(img_path: str):
    img = Image.open(img_path)
    resize_size=(256, 256)
    crop_size=(224, 224)
    mean=[0.485, 0.456, 0.406]
    std=[0.229, 0.224, 0.225]
    out = F.pil_to_tensor(img)
    out = F.resize(out, size=resize_size, interpolation = InterpolationMode.BILINEAR)
    out = F.center_crop(out, output_size=crop_size)
    out = out.to(torch.float, copy=False) / 255.
    out = F.normalize(out, mean, std)
    out = np.transpose(out.numpy(), axes=[1, 2, 0])
    return out

make_calib_man(
    pre_ftn=preprocess_resnet50, # callable function to pre-process the calibration data
    data_dir="/workspace/calibration/cali_1000", # path to folder of original calibration data files such as images
    save_dir="/workspace/calibration/", # path to folder to save pre-processed calibration data files
    save_name="resnet50_cali", # tag for the generated calibration dataset
    max_size=100 # Maximum number of data to use for calibration
)
Compiling Models#
Once the calibration dataset and model are prepared, the user can compile the model as follows. As well as the given ResNet50, most classification models are fully supported on Mobilint’s compiler, and the compiled MXQ can directly be used in classification tasks.
""" Compile resnet """
from qubee import mxq_compile
onnx_model_path = "/workspace/resnet50.onnx"
calib_data_path = "/workspace/calibration/resnet50_cali"

mxq_compile(
    model=onnx_model_path,
    calib_data_path=calib_data_path,
    quantize_method = "maxpercentile", # quantization method to use
    is_quant_ch=True, # whether to use channel-wise quantization
    quantize_percentile=0.999,
    topk_ratio=0.01,
    quant_output="layer", # quantization method for the output layer
    save_path="resnet50.mxq",
    backend="onnx"
)